前言 本人也是才疏学浅,突发奇想发本篇博客,希望多多交流一下。可能思路并不正确,只是误打误撞,有待大佬指正。
首先说明一下,本文只是针对PyInstaller打包的exe程序,想要修改pyz、py等文件内的内容并且重新打包时所遇到的一些问题做一下记录,不涉及软件攻防对抗技术。
前段时间发现一个exe程序,为了保护隐私就不说具体功能了。总之在打开的时候需要输入激活码,正确之后才能进入页面,说实话在安卓逆向里面这种情况还是比较多见的,常见的思路也是修改下Activity或者某处判断。利用DIE工具探明其是python打包的exe,于是我打算解包看一下校验逻辑。
最终逻辑确定是在启动的时候需要输入激活码,经过一系列变化之后和RSA牵扯上关系了。开发者有一个私钥,用了一个私钥加密机器码,公钥解密的大概思路进行校验的。从逻辑看不出漏洞,而且RSA又不是我能撼动的。但是最终分析发现软件只会在启动的时候判断是否激活,在判断激活码是否正确的时候是用了一个简单的if判断,想必改一下条件就行了。虽然说起来简单,但是最终是在pyz文件进行修改的,也是经历了一波三折,于是打算写一个博客记录一下。
当然最终会写一个简单的demo,不会用现实的软件作为例子,但是思路方法都是通用的。
PyInstaller打包流程 首先需要安装Pyinstaller工具
输入命令:python -m pip install pyinstaller即可安装
为了方便演示,我们不妨写一个只会输出一句话的python程序出来。在这个阶段我们的目标是修改程序内部提示的字符串。
1
2
> python simple.py I am bob!
我们输入pyinstaller 后面跟着py的文件,就能实现打包。
为了简单起见,我们先不用以下参数:-F 生成单个文件 -n指定生成的文件名 -i 指定生成exe的图标
运行之后目录结构如下:
1
2
3
4
2026/08/01 22:57 <DIR> build 2026/08/01 22:57 <DIR> dist 2026/08/01 22:54 18 simple.py 2026/08/01 22:57 783 simple.spec
我们注意到多出了三个文件夹。
bulid文件夹存放的是打包过程中出现的中间文件,包括一些依赖库等
dist文件夹存放的是成品。
而spec文件,就是一个配置文件。在这个例子中如下所示:
1 2 3 4 5 6 7 8 9 10 11 12 13 14 15 16 17 18 19 20 21 22 23 24 25 26 27 28 29 30 31 32 33 34 35 36 37 38 39 40 41 42 43 44 45 a = Analysis( ['simple.py' ],//入口文件 pathex=[],//添加python搜索路径 binaries=[],//添加二进制文件 datas=[],//普通资源文件 hiddenimports=[], hookspath=[], hooksconfig={}, runtime_hooks=[], excludes=[], noarchive=False ,//控制 Python 字节码是否打包成 PYZ optimize=0 , ) pyz = PYZ(a.pure) exe = EXE( pyz, a.scripts, [], exclude_binaries=True , name='simple' , debug=False , bootloader_ignore_signals=False , strip=False , upx=True , console=True , disable_windowed_traceback=False , argv_emulation=False , target_arch=None , codesign_identity=None , entitlements_file=None , ) coll = COLLECT( exe, a.binaries, a.datas, strip=False , upx=True , upx_exclude=[], name='simple' , )
我们运行exe,发现其按照预期输出了文字。
只不过运行速度显著变慢了。这也是pyinstaller打包的一个弊端。现在我们打开ida,尝试能不能直接定位到相关字符串,很明显是定位不到的。原因是相关代码都放在了pyc里面,怎么可能让我们轻易搜索到呢?
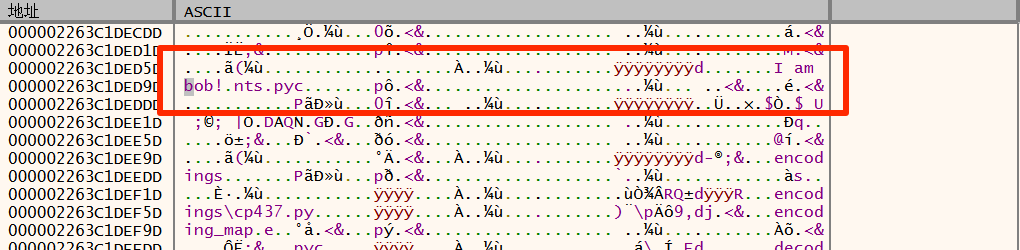
那能否通过动态调试定位到字符串呢?答案是显而易见的,可以:
但是在X64DBG里面,我们是没办法直接patch这个地方的,于是思路又受到堵塞了。接下来就要介绍pyinstall打包后的exe结构了。在此之前,让我们介绍一个工具,可以提取出此种方式打包的exe的资源:pyinstxtractor工具
在github仓库下载这个脚本,然后直接输入以下命令即可提取出数据:
1 2 3 4 5 6 7 8 9 10 11 12 13 14 >python pyinstxtractor.py simple.exe [+] Processing simple.exe [+] Pyinstaller version: 2.1+ [+] Python version: 3.13 [+] Length of package: 1382431 bytes [+] Found 10 files in CArchive [+] Beginning extraction...please standby [+] Possible entry point: pyiboot01_bootstrap.pyc [+] Possible entry point: pyi_rth_inspect.pyc [+] Possible entry point: simple.pyc [+] Found 112 files in PYZ archive [+] Successfully extracted pyinstaller archive: simple.exe You can now use a python decompiler on the pyc files within the extracted directory
输入之后,即可发现同目录之下多了一个文件夹,里面正是提取的文件,自然和bulid目录下面的有所差别,不过问题不大,能定位到核心pyc文件
然后我们反编译pyc即可看到源码,这里就不多演示了。可以去在线网站随便找一个就行。
这里主要想介绍一下同时生成出来的其他文件,比如pyd和pyz。pyz可以简单理解为多个pyc文件进行压缩之后的产物,一般在提取资源目录下的PYZ.pyz_extracted会把它提取出来。pyd文件则是可以类比为DLL文件。 Python 规定:一个带有 Python C API 接口的 DLL,命名为 .pyd。
写到这里才发现忘记介绍pyc了,大家可以参考这篇博客:https://blog.csdn.net/answer3lin/article/details/87374093
大概就是py编译出来的文件,提高了执行速度等,用import导入的时候包就会变成pyc。
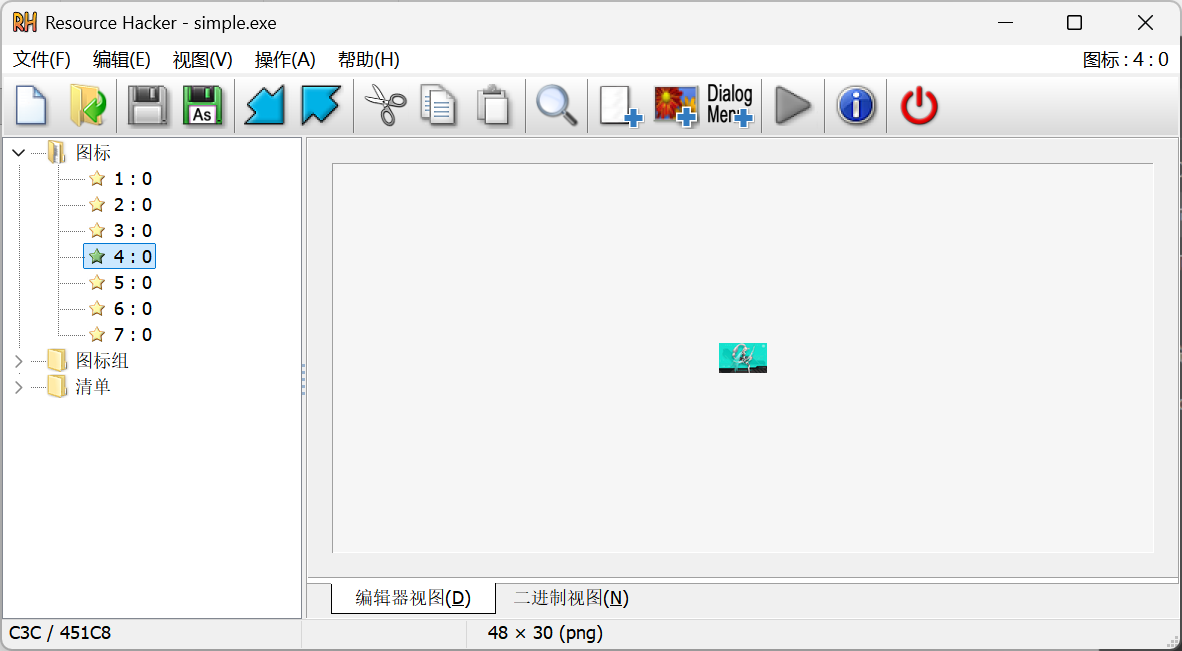
py打包的exe PE结构 首先说明一下,我这里没有用icon这个来生成exe。如果用的话效果是什么呢?我们可以试一下
可以看到确实会在PE相应区域存在一个图标,这里我只是满足下好奇心,就不多展开了。还是先简单介绍一下py打包的exe的PE结构比较要紧
先看一下普通的C或者C++开发的exe的一般PE结构:
1 2 3 4 5 6 7 8 9 .exe | ├── PE Header | ├── .text 代码 ├── .data 数据 ├── .rdata 常量 ├── .rsrc 资源(图标等) └── .reloc
再看看我们亲爱的pyinstaller的打包的exe的PE结构:
1 2 3 4 5 6 7 8 9 10 11 12 13 14 15 16 17 18 19 20 21 22 23 24 25 26 27 28 29 30 .exe | ├── PE Header | ├── .text | | | └── PyInstaller Bootloader//PyInstaller 自制的 Windows 原生 C 语言编写的 EXE 启动加载器 | ├── .rdata | ├── .rsrc | | | └── 图标、版本信息 | └── Overlay区域 | └── CArchive | ├── PYZ.pyz | ├── python DLL | ├── pyd | ├── dll | └── 数据文件 |____TOC//目录表 | |____Cookie
这里的.text段确实是用C语言写的,主要功能问了AI,是下面这些:初始化
1、找自己的资源
2、解包 CArchive
3、加载 Python
4、执行 pyc
既然exe运行的时候是从这些部分拿资源的,那我们只需要在这里面进行修改,不就得了吗?
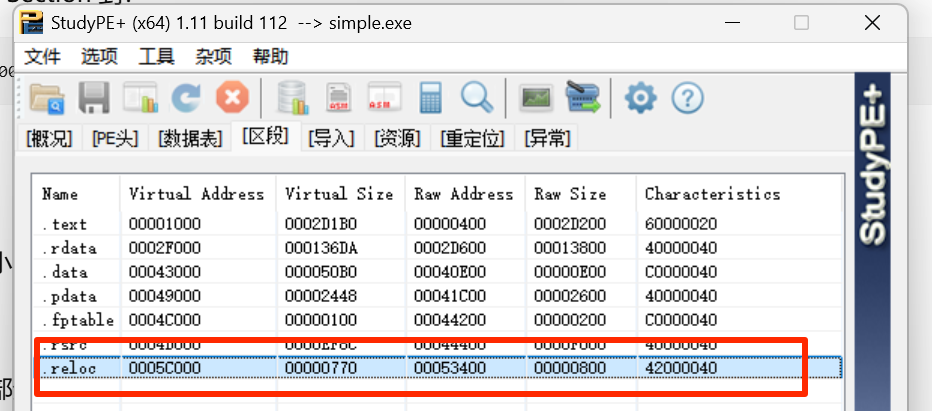
利用工具发现最后一个节区位置在0x53400+0x800处,后面估计就是我们自己python这部分的内容。现在初步了解到这里,卡住了思路,我能直接改后面的内容吗?不如从官方手册看看官方怎么解释的。
参考官方文档:Advanced Topics — PyInstaller 6.21.0 documentation
这里给了我们两个重要信息:
2、直接修改exe文件,可能会影响TOC表,导致exe打开出错!
开发者其实告诉了我们如何进行重打包,我自己总结了有两种思路。本着对标题的负责,我将两种思路都阐述阐述。
思路一:利用spec文件 场景一 还记得刚才我们说的话吗?spec文件就是puc的配置文件。可能读者会骂我:我都有这配置文件了,说明我他妈也有源码啊?还用得着你教
但是这就是官方手册提到的一种思路。适用于一些团队形式的开发,可以理解为spec才是编译配置,我们上文说的命令实则是spec编译的cli简化版本。下面是官方手册摘抄,大概介绍了如何构建源码一样的情况下exe一样的场景,我们可以简单看看,当然对我们也不是完全没有启发,万一是一个ctf的出题点子呢
In certain cases it is important that when you build the same application twice, using exactly the same set of dependencies, the two bundles should be exactly, bit-for-bit identical.
That is not the case normally. Python uses a random hash to make dicts and other hashed types, and this affects compiled byte-code as well as PyInstaller internal data structures. As a result, two builds may not produce bit-for-bit identical results even when all the components of the application bundle are the same and the two applications execute in identical ways.
You can ensure that a build will produce the same bits by setting the PYTHONHASHSEEDPYTHONHASHSEED'random'. For example, execute PyInstaller in a script such as the following (for GNU/Linux and macOS):PYTHONHASHSEED 环境变量设置为一个已知的整数值,来确保生成的二进制文件包含相同的代码块。这样就能确保 Python 在 PYTHONHASHSEED 未取消设置或设置为 'random' 之前,始终使用相同的随机哈希序列。例如,可以在脚本中执行如下命令(适用于 GNU/Linux 和 macOS 系统):
1 2 3 4 5 6 7 8 9 ># set seed to a known repeatable integer value >PYTHONHASHSEED=1 >export PYTHONHASHSEED ># create one-file build as myscript >pyinstaller myscript.spec ># make checksum >cksum dist/myscript/myscript | awk '{print $1}' > dist/myscript/checksum.txt ># let Python be unpredictable again >unset PYTHONHASHSEED
Changed in version 4.8: The build timestamp in the PE headers of the generated Windows executables is set to the current time during the assembly process. A custom timestamp value can be specified via the SOURCE_DATE_EPOCH environment variable to achieve reproducible builds .SOURCE_DATE_EPOCH 环境变量指定自定义的时间戳值,以确保构建结果的可重复性。
场景二 当然不会这么简单。还有场景二,我们想,既然控制spec文件就能控制编译过程,那么我们岂不是可以将提取出来的pyc重新塞回去吗?python -m compileall simple.py将修改后的py打包成pyc。这就当作我们自己patch了。
然后我们思考怎么伪造spec文件才能达到目标呢?
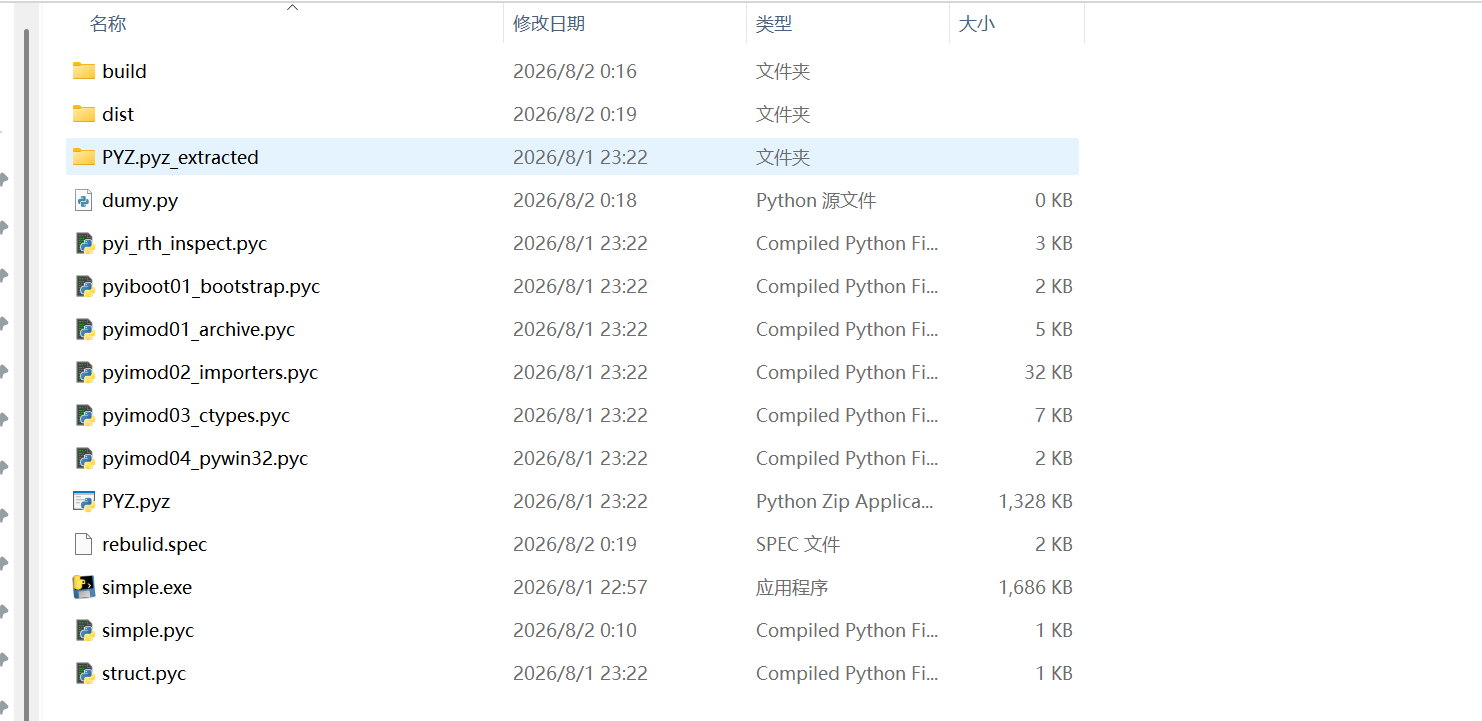
现在我们手上的只有这些东西,如何重新打包?(dist、build目录为我测试的时候的东西,大家可以不必理会即可)
核心思路只有一个:在pyinstaller收集pyc文件并且将他们变为pyz的时候,火速让pyc文件全部变成我们所指定的即可
首先我们看刚才标准配置文件的这一行:
1 2 3 4 a = Analysis( ['simple.py'],//入口文件
这里固定死是py不能动的。但是之前我们解包拿到的只有入口pyc,因此我们必须先创建一个空的python文件(对应上图的dumy.py),这样才能在这里不报错!
继续看这一行:
这里说明了在哪个路径找模块。所有的pyc都在这个目录里,因此这里设置为当前目录
接下来加入这一行:(PYMODULE只是配合pyinstaller官方写法)
1 2 3 4 5 6 a.pure = TOC() for fname in os.listdir(work_dir): if fname.endswith(".pyc" ): module_name = fname[:-4 ] full_path = os.path.join(work_dir, fname) a.pure.append((module_name, full_path, "PYMODULE" ))
a.pure 是一个 TOC(Table Of Contents,目录表)对象 ,专门存放要打包进 PYZ.pyz 压缩包内的普通 Python 模块(.pyc字节码文件) 。我们这里的函数是直接将pyc对应添加进去了
下面我们直接设置入口pyc。PyInstaller 整套运行流程:
双击 exe → bootloader(C 写的底层加载器)→ 读取 a.scripts 里标记为 PYSOURCE 的文件 → 执行这份代码 → 这份代码内部再去 PYZ 包里 import 各类模块(a.pure 里的东西)
那我们直接在这里指定入口pyc即可,如下所示。
1 2 3 4 5 # 强制把simple设置为真实运行入口,覆盖dummy无效空脚本 a.scripts = TOC([ ("simple", os.path.join(work_dir, "simple.pyc"), "PYSOURCE") ])
完整配置文件如下:
1 2 3 4 5 6 7 8 9 10 11 12 13 14 15 16 17 18 19 20 21 22 23 24 25 26 27 28 29 30 31 32 33 34 35 36 37 38 39 40 41 42 43 44 45 46 47 48 49 50 51 52 # -*- mode: python ; coding: utf-8 -*- block_cipher = None from PyInstaller.building.datastruct import TOC import os work_dir = os.path.abspath(".") a = Analysis( ['dumy.py'], pathex=[work_dir], binaries=[], datas=[], hiddenimports=[], hookspath=[], hooksconfig={}, runtime_hooks=[], excludes=[], win_no_prefer_redirects=False, win_private_assemblies=False, cipher=block_cipher, noarchive=False, ) # 清空Analysis自动收集的默认模块,全部替换为我们自己的pyc a.pure = TOC() for fname in os.listdir(work_dir): if fname.endswith(".pyc"): module_name = fname[:-4] full_path = os.path.join(work_dir, fname) a.pure.append((module_name, full_path, "PYMODULE")) # 强制把simple设置为真实运行入口,覆盖dumy无效空脚本 a.scripts = TOC([ ("simple", os.path.join(work_dir, "simple.pyc"), "PYSOURCE") ]) pyz = PYZ(a.pure, a.zipped_data, cipher=block_cipher) exe = EXE( pyz, a.scripts, a.binaries, a.zipfiles, a.datas, [], name='rebuild', debug=False, bootloader_ignore_signals=False, strip=False, upx=True, console=True, )
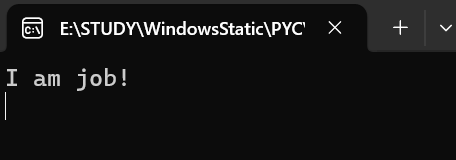
我们py文件只是修改了一下把bob变成job(刚开始打印的是bob)现在运行来看是否奏效:
可以看到还是成功修改的。
思路二:手动解析+代码重写入 既然动exe怕影响TOC,我们直接暴力重构TOC不就可以了,哪来那么多废话。这里核心还是先patch好pyc文件,然后重新zlib压缩为pyz,随后修改TOC表,防止运行过程中出错。
首先介绍一下,pyc 文件 = marshal代码字节 + 头部校验字节(16字节),PYZ 归档里只存放剥离 pyc 头部的纯 marshal 二进制数据 。
因此首先我们需要初步处理一下pyc文件,让他前16字节消失,这里为了简便就直接用ai写代码了:
1 2 3 4 5 6 7 8 9 10 11 12 13 def extract_raw_marshal (pyc_path: str , out_bin_path: str ): with open (pyc_path, "rb" ) as f: pyc_buf = f.read() marshal_raw = pyc_buf[16 :] with open (out_bin_path, "wb" ) as f: f.write(marshal_raw) //print (f"[提取成功] 原始marshal数据已输出 → {out_bin_path} " ) //print (f"pyc总大小: {len (pyc_buf)} byte | marshal纯数据: {len (marshal_raw)} byte" ) if __name__ == "__main__" : extract_raw_marshal("simple.pyc" , "simple_marshal.bin" )
然后我们接下来需要注意了,我们需要直接读取pyz文件,并且重新计算模块偏移,生成一个完美的pyz文件并且添加到exe里面
整体流程如下:
1、读取原始 exe 完整二进制、读取剥离 16 字节 pyc 头的纯净 marshal 字节码
2、读取 exe 末尾 Cookie,解析归档全局参数;调用解析函数,把二进制 TOC 解析成结构化文件列表
3、遍历所有归档文件条目:匹配目标文件则替换为新 marshal 数据,其余文件原样拷贝二进制
4、动态拼接全新归档数据区,实时自动计算每个文件新偏移、压缩长度、原始长度,同步生成新版 TOC 结构
5、序列化 TOC、重新计算归档总长 / TOC 偏移,生成合法新 Cookie(Bootloader 依靠 Cookie 校验归档合法性)
6、按标准结构拼接 Bootloader + 新归档数据 + 新 TOC + 新 Cookie,写出修补后的 exe
上面说的太专业了。首先我们得读取出来原来的TOC表,不然谈何修改。
根据TOC表的结构,按照固定长度切割,然后用struct函数进行读取解析即可。这里我们用了下面俩库:
1 2 from PyInstaller.archive.readers import CArchiveReaderfrom PyInstaller.archive.writers import CArchiveWriter
用这俩之后能用里面的一些常量和函数等,对解析结构有如虎添翼的帮助!
1 2 3 4 5 6 7 8 9 10 11 12 13 14 15 def _parse_toc_entries (exe_buffer, start_offset, toc_offset, toc_length ): """按原始顺序解析CArchive TOC,保留OPTION等特殊条目。""" toc_raw = exe_buffer[start_offset + toc_offset: start_offset + toc_offset + toc_length] entries = [] ptr = 0 entry_header_len = CArchiveWriter._TOC_ENTRY_LENGTH while ptr < len (toc_raw): entry_length, data_offset, compressed_length, data_length, compress, typecode = struct.unpack( CArchiveWriter._TOC_ENTRY_FORMAT, toc_raw[ptr:ptr + entry_header_len], ) name = toc_raw[ptr + entry_header_len: ptr + entry_length].rstrip(b"\x00" ).decode("utf-8" ) entries.append((name, data_offset, compressed_length, data_length, compress, typecode.decode("ascii" ))) ptr += entry_length return entries
上面是解析TOC表,在此之前必须得找到TOC表,还记得我们导入的库吗?这时候派上用场了
1 reader = CArchiveReader(origin_exe_path)
这部分是核心算法,通过计算patch后的大小,构建新的TOC表:
1 2 3 4 5 6 7 8 9 10 11 12 13 for name, old_offset, old_compressed_len, old_uncompressed_len, old_compress, old_typecode in old_entries: if name == target_entry: if old_compress: blob = zlib.compress(new_marshal, level=CArchiveWriter._COMPRESSION_LEVEL) else : blob = new_marshal uncompressed_len = len (new_marshal) replaced = True else : blob = exe_buffer[bootloader_size + old_offset: bootloader_size + old_offset + old_compressed_len] uncompressed_len = old_uncompressed_len
然后就是按照exe布局,将这些pyz啦cookie啦巴啦啦的都拼接到exe原来位置即可:
1 2 3 4 5 6 7 8 9 10 11 12 13 14 15 16 new_toc_bytes = CArchiveWriter._serialize_toc(new_toc_entries) new_toc_offset = len (new_data_section) new_archive_total_length = new_toc_offset + len (new_toc_bytes) + cookie_len new_cookie = struct.pack( cookie_format, magic, new_archive_total_length, new_toc_offset, len (new_toc_bytes), py_ver, py_lib_path, ) final_exe = exe_buffer[:bootloader_size] + bytes (new_data_section) + new_toc_bytes + new_cookie with open (output_exe_path, "wb" ) as f: f.write(final_exe)
因为整体逻辑太复杂,让ai写了个脚本出来,如下所示:
1 2 3 4 5 6 7 8 9 10 11 12 13 14 15 16 17 18 19 20 21 22 23 24 25 26 27 28 29 30 31 32 33 34 35 36 37 38 39 40 41 42 43 44 45 46 47 48 49 50 51 52 53 54 55 56 57 58 59 60 61 62 63 64 65 66 67 68 69 70 71 72 73 74 75 76 77 78 79 80 81 82 83 84 85 86 87 88 89 90 91 92 93 94 95 96 97 import structimport zlibfrom PyInstaller.archive.readers import CArchiveReaderfrom PyInstaller.archive.writers import CArchiveWriterdef _parse_toc_entries (exe_buffer, start_offset, toc_offset, toc_length ): """按原始顺序解析CArchive TOC,保留OPTION等特殊条目。""" toc_raw = exe_buffer[start_offset + toc_offset: start_offset + toc_offset + toc_length] entries = [] ptr = 0 entry_header_len = CArchiveWriter._TOC_ENTRY_LENGTH while ptr < len (toc_raw): entry_length, data_offset, compressed_length, data_length, compress, typecode = struct.unpack( CArchiveWriter._TOC_ENTRY_FORMAT, toc_raw[ptr:ptr + entry_header_len], ) name = toc_raw[ptr + entry_header_len: ptr + entry_length].rstrip(b"\x00" ).decode("utf-8" ) entries.append((name, data_offset, compressed_length, data_length, compress, typecode.decode("ascii" ))) ptr += entry_length return entries def patch_exe (origin_exe_path: str , marshal_bin_path: str , output_exe_path: str , target_entry: str = "simple" ): """把新pyc的marshal直接替换进exe归档里的PYSOURCE条目,而不是PYZ。""" with open (origin_exe_path, "rb" ) as f: exe_buffer = f.read() with open (marshal_bin_path, "rb" ) as f: new_marshal = f.read() reader = CArchiveReader(origin_exe_path) if target_entry not in reader.toc: raise KeyError(f"{target_entry} 不在CArchive条目中,检查目标模块名或是否在PYZ.pyz里" ) bootloader_size = reader._start_offset cookie_len = CArchiveWriter._COOKIE_LENGTH cookie_format = CArchiveWriter._COOKIE_FORMAT magic, _, old_toc_offset, old_toc_length, py_ver, py_lib_path = struct.unpack( cookie_format, exe_buffer[-cookie_len:] ) old_entries = _parse_toc_entries(exe_buffer, bootloader_size, old_toc_offset, old_toc_length) new_data_section = bytearray () new_toc_entries = [] replaced = False for name, old_offset, old_compressed_len, old_uncompressed_len, old_compress, old_typecode in old_entries: if name == target_entry: if old_compress: blob = zlib.compress(new_marshal, level=CArchiveWriter._COMPRESSION_LEVEL) else : blob = new_marshal uncompressed_len = len (new_marshal) replaced = True else : blob = exe_buffer[bootloader_size + old_offset: bootloader_size + old_offset + old_compressed_len] uncompressed_len = old_uncompressed_len new_offset = len (new_data_section) new_toc_entries.append((new_offset, len (blob), uncompressed_len, old_compress, old_typecode, name)) new_data_section += blob if not replaced: raise KeyError(f"CArchive里没有找到 {target_entry} 条目" ) new_toc_bytes = CArchiveWriter._serialize_toc(new_toc_entries) new_toc_offset = len (new_data_section) new_archive_total_length = new_toc_offset + len (new_toc_bytes) + cookie_len new_cookie = struct.pack( cookie_format, magic, new_archive_total_length, new_toc_offset, len (new_toc_bytes), py_ver, py_lib_path, ) final_exe = exe_buffer[:bootloader_size] + bytes (new_data_section) + new_toc_bytes + new_cookie with open (output_exe_path, "wb" ) as f: f.write(final_exe) print (f"[EXE修补写入完成] 已替换条目: {target_entry} → {output_exe_path} " ) print (f"原始exe大小: {len (exe_buffer)} | 修补exe大小: {len (final_exe)} " ) if __name__ == "__main__" : patch_exe( origin_exe_path="simple.exe" , marshal_bin_path="simple_marshal.bin" , output_exe_path="simple_patched.exe" , target_entry="simple" , )
ai还自己加了个容错处理:
1 2 if target_entry not in reader.toc: raise KeyError(f"{target_entry} 不在CArchive条目中,检查目标模块名或是否在PYZ.pyz里" )
执行完之后同样能达到效果:
后记 ai写脚本太好用了,确实给他思路他自己就嘟嘟嘟全写出来了。
而且探索未知真的很爽,感觉自己又多了一个熬夜的回忆。